

The headline reads:
Clark County websites down due to computer virus – Infection could have spread to users
How would you like to be the System Administrator or IT Manager responsible for that? We thought not. In this particular case, an employee brought in a USB thumb drive which contained a virus and plugged it in somewhere. Undetected, the virus made its way across the county’s network until it stumbled upon their content management system (CMS) that manages the county’s website. When a scheduled system update ran -boom; the virus was believed to be on the county’s public website and hitting visitors coming to the site. See the full article here.
Using the WMI Monitor in ELM Enterprise Manager you can implement a safety measure by monitoring for any portable devices, specifically a USB drive, added or removed from your systems. Found in both the System System License and Performance Performance License, the WMI Monitor queries the WMI namespace and generates Actions when the results of the query change. Let’s take a closer look.
To setup ELM to monitor for USB devices, first off we’ll run through the New Monitor Item Wizard and select the WMI Monitor.
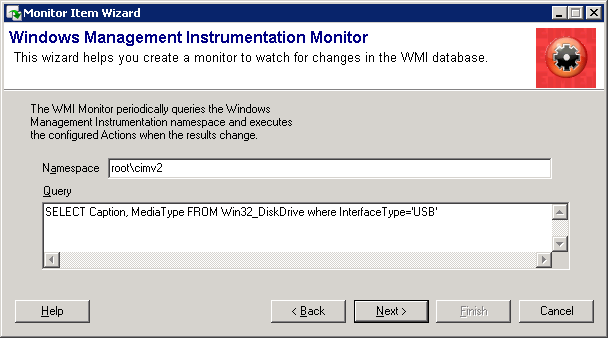
The first step is to specify the Namespace and Query. Typically the namespace “rootcimv2” is used to access classes and instances. The query we’ll use for USB detection can be seen below and is specific to USB devices only. (Note: There are many other fields that can be added to the select query depending on the information you need. In this case we are only concerned with USB devices.)
After the Namespace and Query, make sure to check “Enable Event Creation” on the next dialog.
Next is an option to test the WMI Monitor.
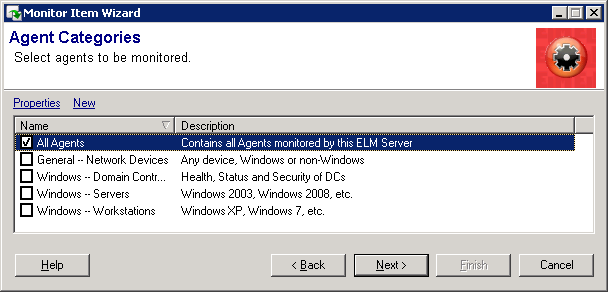
Continuing on we’ll assign this new monitor to an Agent Category. Since we want to monitor all Servers and Workstations (remember a System or Performance license is required), we’ll go ahead and choose All Agents. If you happen to have a few systems without the proper ELM license to utilize the WMI monitor, these systems will simply ignore the monitor item assignment while systems with the supporting license will automatically pick it up.
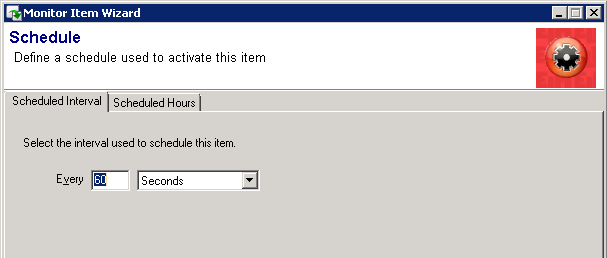
Now we’ll take a look at the schedule for this USB monitor. Every 60 seconds is a good starting point.
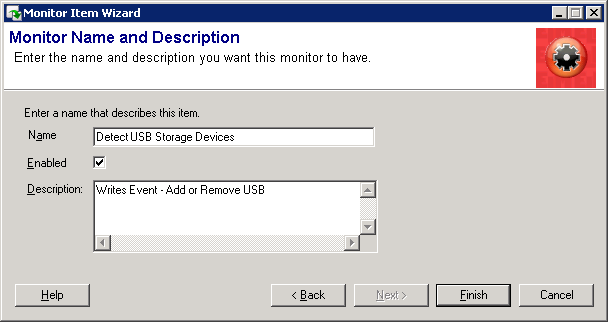
Finally we’ll want to give this new monitor item a very specific name and description based on its intended purpose.
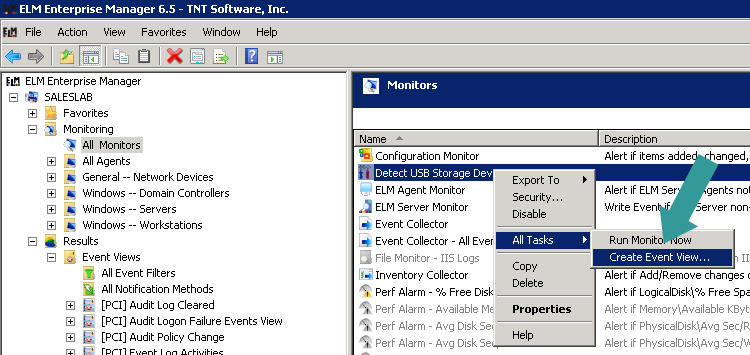
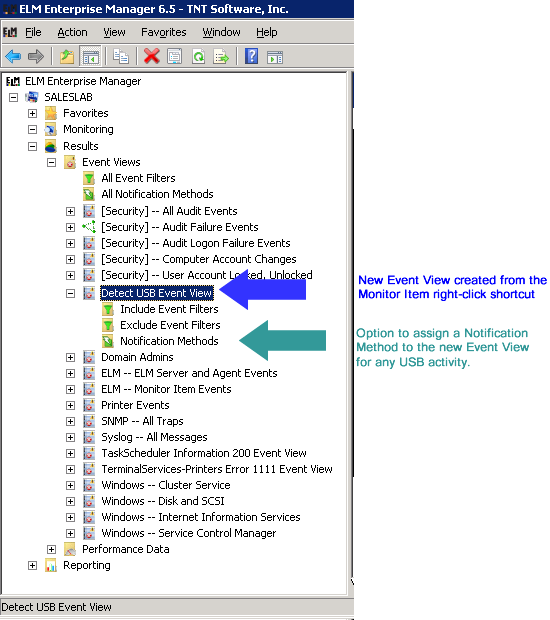
Now that we’re finished with the Monitor Item setup, let’s create an Event View for USB Detection. A fast way to do this is to right click on the new Detect USB Storage Devices monitor item we just finished, and select All Tasks > Create Event View. Then follow the steps in the Event View wizard. This new event view will automatically include Event Filters specific to USB Storage Device monitoring.
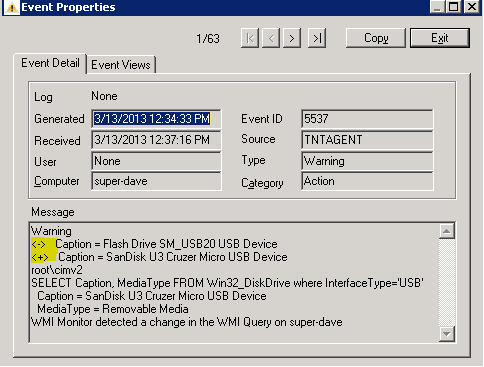
As you can see in the sample Event below, we’ve unplugged and plugged in a few different thumb drives. The <+> indicator is to inform the administrator that this was an additional entry to the query results (Drive Added).
When the removable media is removed from the system the action will be triggered because the query result set will have changed again. This time the visual cue is the <-> like the following:
As with any Event View, you can assign a Notification Method to this new Event View and be notified about any USB activity taking place across your monitored systems.
We hope that you found this article on Use WMI to Monitor for USB and Other Portable Devices informative and useful and wish you continued success with ELM.